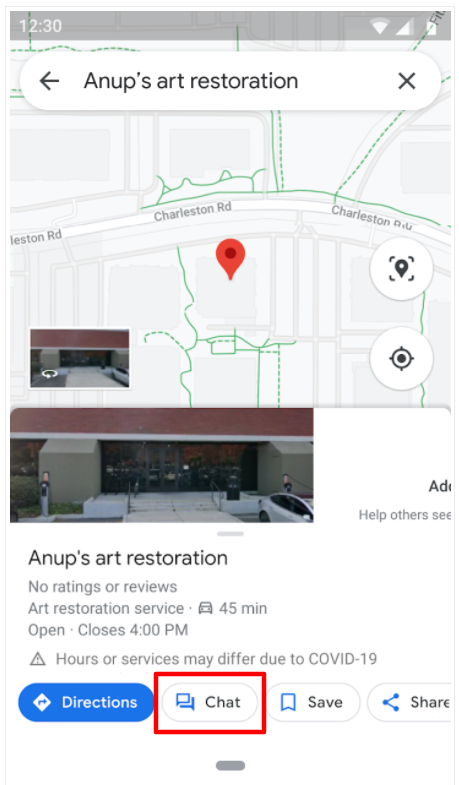
Google Business Messages is a mobile conversational channel that combines entry points on Google Maps, Google Search, and brand websites to create rich messaging experiences that delight customers and drive business results.
You can make it effortless for anyone to discover your brand and chat in real-time on Google Search and Maps. Automate your growth & customer support with marketing Chatbots for Business Messages using nerDigital.

Getting Stared
In order to getting started with Google Business Messages chatbots navigate to:
Click on the Settings from the main navigation menu on the left.
Click on Channels.
Go to Google Business Messages and then click on Connect button.

Testing the bot
Google Business Message can only be used on mobile devices (Android or Apple devices). So you need to test it on your mobile Android or Apple devices as well.
Get the test link that correspond to your device by clicking on Android or Apple button:

The test link will not work on Messenger or Facebook browser, we advise you to send the test link to your email address and open it from your email on your mobile device. If you still want to send the test link using Messenger please follow the instructions on the image below to initiate the conversation with your Google Business Message agent.

Entry Points
Entry points are surfaces where users can start conversations with Business Messages agents. Each entry point has a unique appearance and appears in a different place.
Your agent will work on any entry points only after the agent was verified and launched.
You can launch agents with the Locations, Non-local and Brand-managed entry point groups, each of which enables multiple entry points. Each entry point your agent supports increases your agent’s visibility and drives more conversations for your agent.
Location Entry points
The Location entry point group encompasses entry points that rely on locations.
Google Maps:

Placesheet:

Local Pack:

You need to add at least one location to allow your clients to message your agent from Google Maps, Placesheet or Local Pack entry point.

Next, you need to add Your Location info:
Add your location Name
Enter your location Place ID

In order to get your Place ID click on the "GET My Place ID" Link:
Enter your Google Business Profile location address in the address bar
Copy the Place Id and enter it in our Place Id field

Alternatively, you can get your place Id for your Google Business Profile location using This Tutorial:
Can’t Find Your Google Places ID? Learn The Trick To Find Any Place ID
Non-local entry points
The Non-local entry point group encompasses all entry points that don’t rely on locations.
Featured snippets – this entry point enables conversations with your agent when a user finds contact details through Search:

Sitelinks – entry point enables conversations with your agent when sitelinks appear in Search:

Phone – this entry point enables conversations from the Phone by Google app:

To enable Non-local entry points you will need to provide your phone number and your website domain:

Verify the Agent
After testing your bot and confirming everything is ready, Google will need to verify your bot before the bot is available to the general public.
Click on the Verify button in order to start the process of getting your agent verified by Google:

Enter the required information such as your company support Employ Name, Employee Email Address, and Your Company Website to send a request for verifying your agent:

Congratulations, it's all done. 😊
